 | ||
| Disk monitoring | ||
|---|---|---|
| Prev | Settings for monitoring objects | Next |
Self-Monitoring, Analysis, and Reporting Technology (S.M.A.R.T.) is available on many new SCSI disks. S.M.A.R.T. provides a way for disks to self-check certain physical conditions that are useful predictors of disk failure and send an alert when conditions indicate that a failure may occur soon. This allows the system administrator to take preventive action to protect the data on the disk. To receive alerts in the Storage Foundation for Windows Event Log, S.M.A.R.T. monitoring must be enabled for the global configuration and also on each disk you want checked. The default is to have S.M.A.R.T. monitoring disabled.
If S.M.A.R.T. predicts that a failure occurs, an alert is sent to the Event Log. You can also receive event notification by SMTP email, by pager, and through the SNMP traps that can be displayed in HP OpenView, IBM Tivoli, and CA Unicenter.
Note: |
Dynamic disks belonging to a Microsoft Disk Management Disk Group do not support S.M.A.R.T. monitoring. |
To enable S.M.A.R.T. monitoring
If the S.M.A.R.T. Monitoring command on the context menu is grayed out, then the S.M.A.R.T. monitoring technology is not available on that disk.
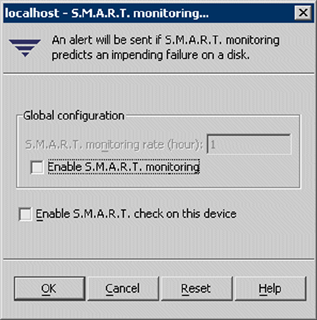
A S.M.A.R.T. monitoring dialog box appears as shown below.
The Enable S.M.A.R.T. monitoring check box acts as an on/off switch for the entire system and lets you temporarily disable S.M.A.R.T. monitoring if desired.
Since this is a global configuration, the monitoring rate is the same for all disks in the system. The default rate is one hour.
S.M.A.R.T. monitoring uses system resources as it checks the device.
More Information