 | ||
| Creating the Replicated Data Sets with the wizard | ||
|---|---|---|
| Prev | Deploying Replicated Data Clusters: New application installation | Next |
| ||
| Creating the Replicated Data Sets with the wizard | ||
|---|---|---|
| Prev | Deploying Replicated Data Clusters: New application installation | Next |
Set up the Replicated Data Sets (RDS) in the primary zone and secondary zone. You can configure an RDS using the Create RDS wizard for both zones.
Configuring Volume Replicator involves setting up the Replicated Data Sets on the hosts for the primary and secondary sites. The Setup Replicated Data Set Wizard enables you to configure Replicated Data Sets for both sites.
If you are using IPv6, make sure that you have set the appropriate IP preference for Volume Replicator before configuring Volume Replicator replication. The default setting is IPv4. When you specify host names while configuring replication, Volume Replicator resolves the host names with the IP addresses associated with them. This setting determines which IP protocol Volume Replicator uses to resolve the host names. Use Veritas Enterprise Administrator (VEA) (Control Panel > VVR Configuration > IP Settings tab) to set the IP preference.
Verify that the data volumes are not of the following types, as Volume Replicator does not support these types of volumes:
Verify that the disk group is imported and the volumes are mounted in the primary and secondary zone.
Verify that you have set the appropriate IP preference, whether Volume Replicator should use IPv4 or IPv6 addresses. The default setting is IPv4.
When you specify host names while configuring replication, Volume Replicator resolves the host names with the IP addresses associated with them. This setting determines which IP protocol Volume Replicator uses to resolve the host names. Use Veritas Enterprise Administrator (VEA) (Control Panel > VVR Configuration > IP Settings tab) to set the IP preference.
Configure the VxSAS service if you have not already done so.
To create the Replicated Data Set
Start VEA from Start > All Programs > Veritas > Veritas Storage Foundation > Veritas Enterprise Administrator.
On Windows 2012 operating systems, from the Apps menu in the Start screen.
From the VEA console, click View > Connection > Replication Network.
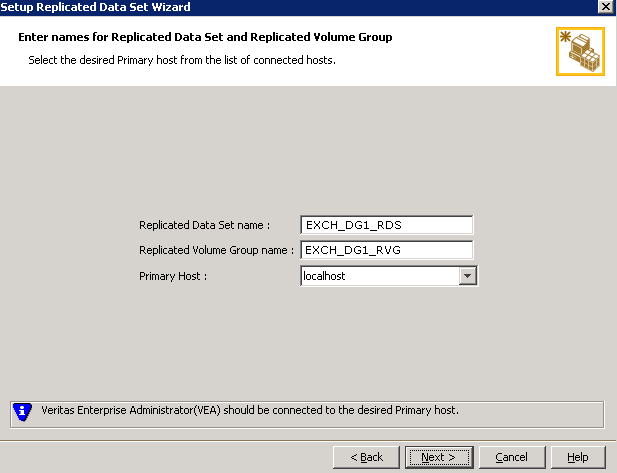
By default, the local host is selected as the Primary Host. To specify a different host name, make sure the required host is connected to the VEA console and select it in the Primary Host list.
If the required primary host is not connected to the VEA console, it does not appear in the drop-down list of the Primary Host field. Use the VEA console to connect to the host.
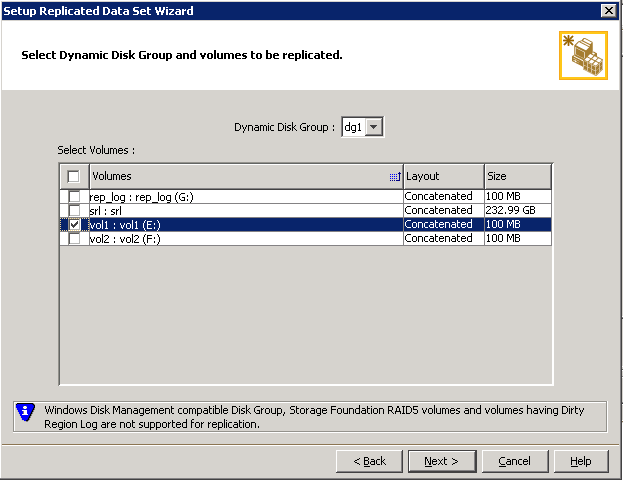
To select multiple volumes, press the Shift or Control key while using the up or down arrow keys.
By default, a mirrored DCM log is automatically added for all selected volumes. If disk space is inadequate to create a DCM log with two plexes, a single plex is created.
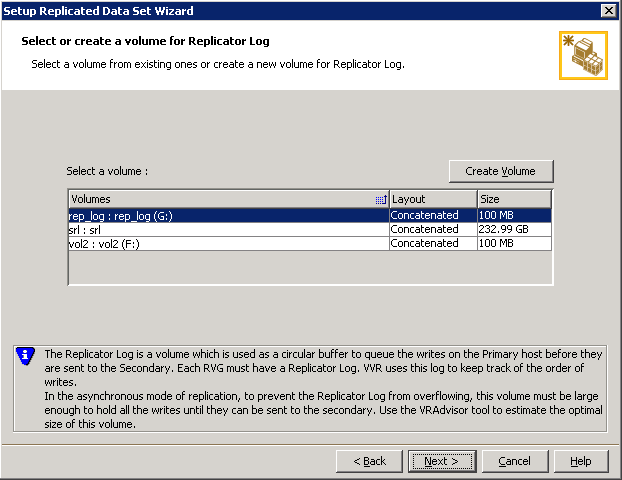
To select an existing volume
Select the volume for the Replicator Log in the table (APP_REPL_LOG). If the volume does not appear in the table, click Back and verify that the Replicator Log volume was not selected on the previous page.
Click Next.
To create a new volume
Click Create Volume and enter the following information in the dialog box that appears:
Click OK to create the Replicator Log volume.
Click Next in the Select or create a volume for Replicator Log dialog box.
RDS with Primary RVG has been created successfully.
Do you want to add Secondary host to this RDS for replication now?
Click No to exit the Setup Replicated Data Set wizard without adding the Secondary host. To add the Secondary host later, use the Add Secondary option from the RDS right-click menu.
Click Yes to add the Secondary host to the Primary RDS now. The Specify Secondary host for replication page appears.
If the Secondary host is not connected to VEA, the wizard tries to connect it when you click Next. This wizard allows you to specify only one Secondary host. Additional Secondary hosts can be added using the Add Secondary option from the RDS right-click menu.
Wait till the connection process is complete and then click Next again.
The option to automatically create volumes on the Secondary host is available only if the disks that are part of the disk group have:
The same or larger amount of space as that on the Primary
Enough space to create volumes with the same layout as on the Primary
Otherwise, the RDS setup wizard enables you to create the required volumes manually.
Click Yes to automatically create the Secondary data volumes and the Replicator Log.
Click No to create the Secondary data volumes and the Replicator Log manually, using the Volume Information on the connected hosts page.
This page does not appear if all the required volumes that are available on the Primary host are also available on the Secondary hosts.
If the required data volumes and the Replicator Log have not been created on the Secondary host, then the page displays the appropriate message against the volume name on the Secondary.
If an error occurs or a volume needs to be created, a volume displays with a red icon and a description of the situation. To address the error, or to create a new Replicator Log volume on the secondary site, click the volume on the secondary site, click the available task button and follow the wizard.
Depending on the discrepancies between the volumes on the primary site and the secondary site, you may have to create a new volume, recreate or resize a volume (change attributes), or remove either a DRL or DCM log.
When all the replicated volumes meet the replication requirements and display a green check mark, click Next.
If all the data volumes to be replicated meet the requirements, this screen does not occur.
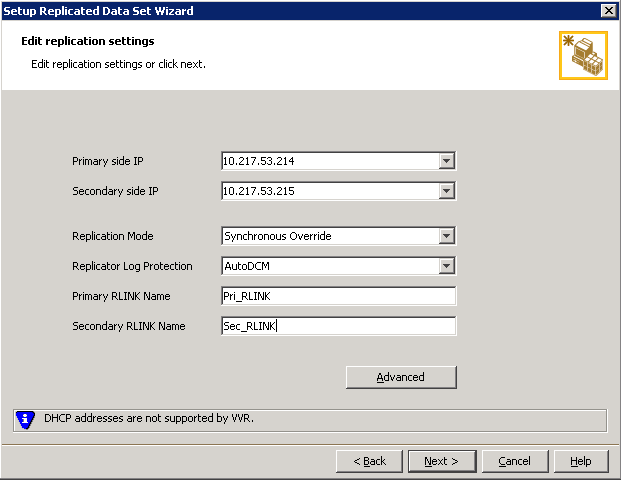
To modify each of the default values listed on this page, select the required value from the drop-down list for each property. If you do not wish to modify basic properties then replication can be started with the default values when you click Next.
|
Primary side |
IP Enter the virtual IP address for the Primary IP resource that will be used for replication. If there is more than one IP address available for replication, you can choose the one that you want to use from the drop-down list. If the required IP address is not displayed in the list then edit the field to add the IP address. |
|
Secondary side IP |
Enter the virtual IP address on the Secondary that is to be used for replication. If there is more than one IP address available for replication, you can choose the one that you want to use from the drop-down list. If the required IP address is not displayed in the list then edit the field to add the IP address. |
|
Replication Mode |
Select the required mode of replication:
If the Secondary is set to the synchronous mode of replication and is disconnected, the Primary data volumes with NTFS file systems may be displayed with the status as missing. |
|
Replicator Log Protection |
|
|
Primary RLINK Name |
This option enables you to specify a Primary RLINK name of your choice. If you do not specify any name then Volume Replicator assigns a default name. |
|
Secondary RLINK Name |
This option enables you to specify a Secondary RLINK name of your choice. If you do not specify any name then Volume Replicator assigns a default name. |
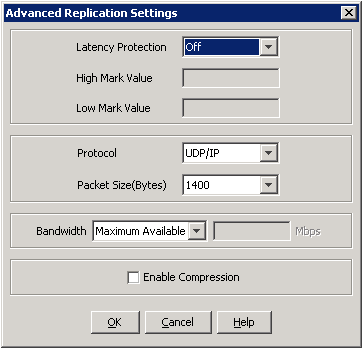
If you want to specify advanced replication settings, click Advanced. Edit the replication settings for a secondary host as needed.
Caution: |
When determining the high mark and low mark values for latency protection, select a range that is sufficient but not too large to prevent long durations of throttling for write operations. |
|
Latency protection |
Determines the extent of stalling write operations on the primary site to allow the secondary site to "catch up" with the updates before new write operations can occur. Off is the default option and disables latency protection. Fail enables latency protection. If the number of outstanding write operations reaches the High Mark Value (described below), and the secondary site is connected, Volume Replicator stalls the subsequent write operations until the number of outstanding write operations is lowered to the Low Mark Value (described below). If the secondary site is disconnected, the subsequent write operations fail. Override enables latency protection. This option resembles the Off option when the secondary site is disconnected, and the Fail option when the secondary site is connected. Throttling of write operations affects application performance on the primary site; use this protection only when necessary according to replication throughput and application write patterns. |
|
High Mark Value |
Is enabled only when either the Override or Fail latency protection option is selected. This value triggers the stalling of write operations and specifies the maximum number of pending updates on the Replicator Log waiting for replication to the secondary site. The default value is 10000, the maximum number of updates allowed in a Replicator Log. |
|
Low Mark Value |
Is enabled only when either the Override or Fail latency protection options is selected. After reaching the High Mark Value, write operations on the Replicator Log are stalled until the number of pending updates drops to an acceptable point at which the secondary site can "catch up" to the activity on the primary site; this acceptable point is determined by the Low Mark Value. The default value is 9950. |
|
Protocol |
UDP/IP is the default protocol for replication. |
|
Packet Size |
Updates to the host on the secondary site are sent in packets; the default size 1400 bytes. The option to select the packet size is enabled only when UDP/IP protocol is selected. |
|
Bandwidth |
By default, Volume Replicator uses the maximum available bandwidth. To control the bandwidth used, specify the bandwidth limit in Mbps. |
|
Enable Compression |
Enable this checkbox if you want to enable Compression for the secondary host. |
Click OK to close the dialog box and then click Next.
To add the Secondary and start replication immediately, select Start Replication with one of the following options:
|
Synchronize Automatically |
If virtual IPs have been created, select the Synchronize Automatically option, which is the default recommended for initial setup to start synchronization of Secondary and start replication immediately. If the virtual IPs for replication are not yet created, automatic synchronization remains paused and resumes after the Replication Service Group is created and brought online. When this option is selected, Volume Replicator by default performs intelligent synchronization to replicate only those blocks on a volume that are being used by the file system. If required, you can disable intelligent synchronization.
|
||
|
Synchronize from Checkpoint |
If you want to use this method, then you must first create a checkpoint. If you have considerable amount of data on the Primary data volumes, then you may first want to synchronize the secondary for existing data using the backup-restore method with checkpoint. After the restore is complete, use the Synchronize from Checkpoint option to start replication from checkpoint to synchronize the secondary with the writes that happened when backup-restore was in progress. For information on synchronizing from checkpoints, refer Volume Replicator Administrator's Guide. |
To add the secondary without starting replication, deselect the Start Replication option. You can start replication later by using the Start Replication option from the Secondary RVG right-click menu.
Click Next to display the Summary page.
Click Back to change any information you had specified.
Otherwise, click Finish to add the secondary host to the RDS and exit the wizard.
If you have set up additional disk groups for the application, repeat this procedure for each additional disk group. Provide unique names for the Replicated Data Set name, and the Replicated Volume Group name.