 | ||
| Creating dynamic volumes for campus clusters | ||
|---|---|---|
| Prev | Configuring SFW storage | Next |
This section will guide you through the process of creating a volume on a dynamic disk group for a campus cluster.
For creating volumes for other types of clusters, see the following:
See Creating dynamic volumes for high availability clusters.
Before you begin, review the following topics:
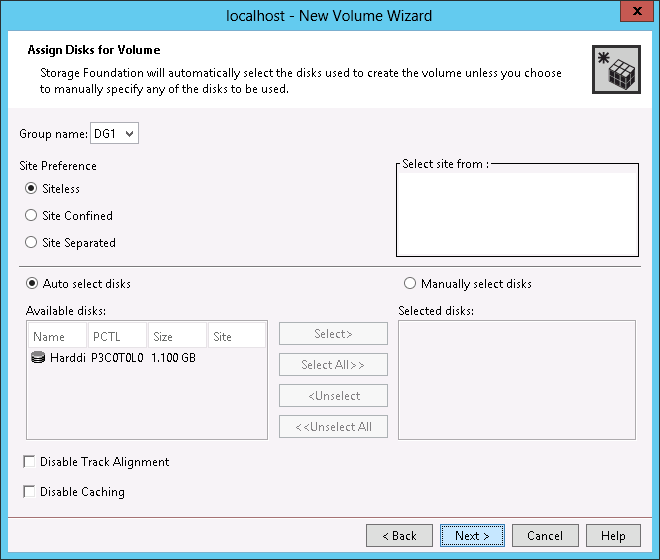
See Adding disks to campus cluster sites.
Note: |
When assigning drive letters to volumes, ensure that the drive letters that you assign are available on all nodes. |
To create dynamic volumes
Select a profile if prompted.
(Skip to step 4 if VEA is already connected to the appropriate host)
You can right-click the disk group you have just created, for example INST1_DG.
Click Next.
|
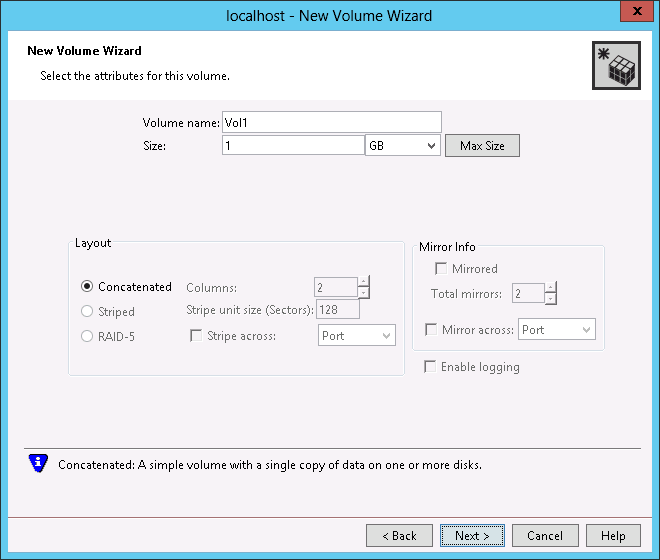
Volume name |
Specify a name for the volume.
|
||
|
Size |
Specify a size for the volume. If you click Max Size, the Size box shows the maximum possible volume size for that layout in the dynamic disk group. |
||
|
Layout |
Ensure that the Mirrored checkbox is selected. Select a layout type as follows: Select either Concatenated or Striped. If you are creating a striped volume, the Columns and Stripe unit size boxes need to have entries. Defaults are provided. In addition, click the Stripe across checkbox and select Ports from the drop-down list. |
||
|
Mirror Info |
Click Mirror across and select Enclosures from the drop-down list. When creating a site separated volume, as required for campus clusters, the number of mirrors must correspond to the number of sites. If needed, you can add more mirrors after creating the volume. |
||
|
Enable logging |
Verify that this option is not selected. |
Click Next.
Make sure the Format this volume checkbox is checked and click NTFS.
Select an allocation size or accept the default.
The file system label is optional. SFW makes the volume name the file system label.
Select Perform a quick format if you want to save time.
Select Enable file and folder compression to save disk space. Note that compression consumes system resources and performs encryption and decryption, which may result in reduced system performance.
Click Next.
Create the cluster disk group and volumes on the first node of the cluster only.