 | ||
| Prerequisite for adding data volumes to an RDS | ||
|---|---|---|
| Prev | Adding volumes | Next |
Verify that the volumes to be added to the RDS have already been created on the Primary host. By default, Volume Replicator adds the Data Change Map (DCM) log to all volumes that are selected to be a part of the RDS. If the disk space available is not adequate for creating DCM with mirrored plexes, then, Volume Replicator creates DCM with a single plex.
Although, you can add the data volume to the RDS even when replication is in progress, there is no way to synchronize the newly added volumes using Volume Replicator. Veritas recommends that you synchronize the data volumes first, using the methods such as Backup and Restore and then add them to the RDS.
To add data volumes to an RDS
Read the information that is provided in the message box carefully. To proceed with adding new volumes, click Yes.
If VEA is not connected to the Primary, the wizard tries to connect to it. Wait till the connection process is complete and then click Next again.
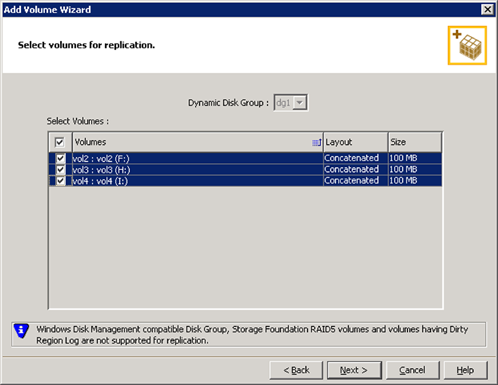
Complete the information on this panel as follows:
After specifying the required information, click Next.
If VEA is not connected to the Secondary hosts, the wizard tries to connect them. Wait till the connection process is complete and then click Next again.
This panel does not appear if all the required volumes that are available on the Primary host are also available on the Secondary hosts.
Because the volume is not created, the Create Volume option is enabled. Click this option to create the required volumes on the Secondary host, corresponding to those on the Primary.
The Create Volume dialog automatically displays the volume name and the size after verifying the information about the Primary host.
Complete the information as follows:
After verifying the information click OK to create the required volume. You are then taken back to the Volume information about connected hosts panel.
Repeat the above steps for data volumes and Replicator Log that has not been created.
After all the volumes have been created, the volume information panel is updated to display the volumes on the Primary and Secondary host.
Click Next.
The Volume information on connected hosts panel enables the appropriate option to convert a non-eligible volume to a Volume Replicator acceptable format.
Complete the information on this panel as follows:
After you have converted the non-eligible volumes to a Volume Replicator acceptable format, click Next.
Click Back to change any information or click Finish to add the specified volumes to the RDS and exit the wizard.
More Information
Setting up replication using the Setup Replicated Data Set wizard