 | ||
| Creating a one-time snapshot set | ||
|---|---|---|
| Prev | Scheduling or creating an individual snapshot set for Exchange | Next |
| ||
| Creating a one-time snapshot set | ||
|---|---|---|
| Prev | Scheduling or creating an individual snapshot set for Exchange | Next |
Creating a one-time snapshot set is a two-step process as follows:
The first step is to prepare snapshot mirrors attached to all the original volumes in the specified database. If you are creating a snapshot set after a snapback to refresh existing snapshot mirrors, you can skip this step.
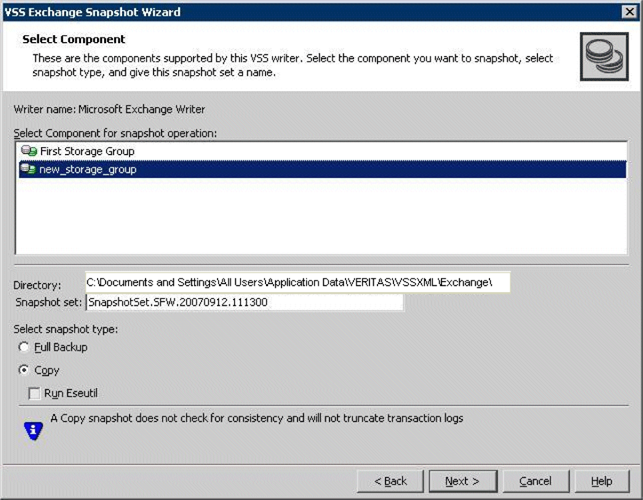
The second step uses either the vxsnap create command or the VSS Exchange Snapshot Wizard to create the snapshot set by detaching the snapshot mirrors from the original volumes. This step creates separate on-host snapshot volumes as well as an XML file to store the Exchange and snapshot volume metadata.
The vxsnap create command and VSS Exchange Snapshot Wizard integrate with VSS to quiesce the databases and then simultaneously snapshot the volumes in the database. This snapshot is done while the databases are online and without disrupting the email flow. The resulting snapshot set provides a complete picture of the database at the point in time the command is issued.
For Exchange 2010, if replication is enabled, you have the option to create a snapshot set of the passive copy instead of the active database. Additional information on the use of passive copy snapshots in a DAG is available.
See Exchange 2010 Database Availability Group (DAG) considerations.
The VSS Exchange Snapshot Wizard can be run from either a local system or a remote node. The vxsnap utility must be run from the local system.
Note that if your Exchange 2010 mailbox database is configured under a VCS cluster, then you can store the snapshot set metadata file in a file share path by configuring a file share resource. This is to avoid configuring extra shared volumes to store the snapshot set file, which is available once the mailbox database fails over.
You can also specify the file share path in place of the redirect.txt path, for example, \\MySystemName1\share1\QRDir. There can be a large number of mailbox databases in Exchange 2010 and each database may have independent schedules. Hence the number of different paths required for storing the snapshot metadata files is higher, which can be achieved by configuring a file share resource.
To create the snapshot set from the VEA console
This panel is displayed only in an environment using Volume Replicator. Otherwise, you will be directly taken to the Schedule Information panel.
The complete syntax of the vxsnap create command is:
vxsnap [-x <filename>] create [source=<volume>]
   [/DriveLetter=<driveLetter>][/DrivePath=<drivePath>][/Newvol=<n
   ewVolName>][/Plex=<plexName>]...writer=<writerName>
   component=<componentName>[backuptype=<backuptype>][-E][-O][-C][
   secHosts=<secondary hosts>]
The WriterName and ComponentName must be included in the command. The option to assign drive letters or mount points is useful for tracking volumes and for scripting purposes. Creating the snapshot set with the copy backup type does not automatically run the Eseutil consistency check nor truncate the transaction logs. You can check the snapshot for consistency by specifying the -E flag.
See vxsnap create.