Creating dynamic cluster disk groups

Create a dynamic cluster disk group with volumes on shared storage so that they can be shared between nodes in the cluster.

Part of the process of creating a dynamic disk group is assigning it a name. Choose a name that is unique to your environment. Make note of this name, as it will be required later.

To create dynamic cluster disk groups, use the Veritas Enterprise Administrator (VEA). The VEA can be invoked on one of the servers and can be used to connect to all the other servers. However, VEA can also be launched on client system and can be used to manage all the servers remotely.

Note:

Setting up a Microsoft failover cluster creates physical disk resources for all the basic disks on the shared bus. To use these disks when you create your SFW cluster disk groups, you must first remove the physical disk resources from the cluster. Otherwise, a reservation conflict occurs. After creating the SFW cluster disk groups, corresponding Volume Manager Disk Group (VMDg) resources are added to the cluster, under the available storage. The VMDg resource name corresponds to the cluster disk group name. You can then assign any of these resources to an application service group..

Note:

Dynamic disks belonging to a Microsoft Disk Management Disk Group do not support cluster disk groups.

To create a dynamic (cluster) disk group

  1. Launch VEA from Start > All Programs > Veritas > Veritas Storage Foundation > Veritas Enterprise Administrator or, on Windows 2012 operating systems, from the Apps menu in the Start screen.

    Select a profile if prompted.

  2. Click Connect to a Host or Domain.
  3. In the Connect dialog box, select the host name from the pull-down menu and click Connect. To connect to the local system, select localhost. Provide the user name, password, and domain if prompted.
  4. To start the New Dynamic Disk Group wizard, expand the tree view under the host node, right click the Disk Groups icon, and select New Dynamic Disk Group from the context menu.
  5. In the Welcome screen of the New Dynamic Disk Group wizard, click Next.
  6. Provide information about the cluster disk group as follows.
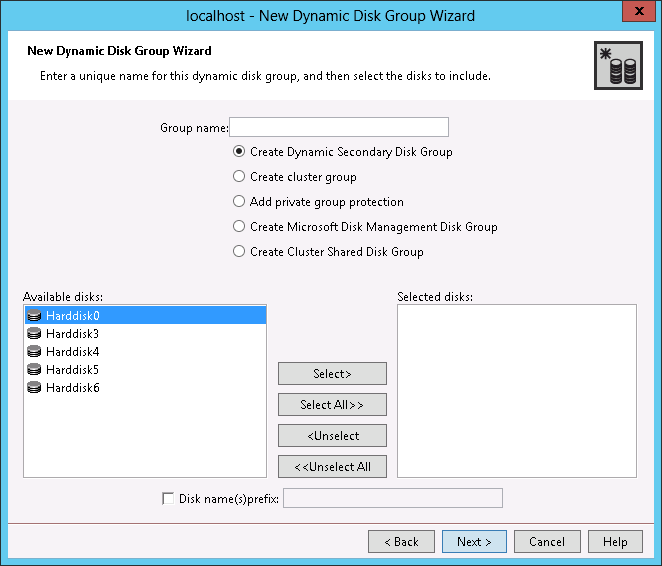
    • In the Group name field, enter a name for the disk group (for example, INST1_DG).

      Note:

      A dynamic disk group name is limited to 18 ASCII characters. It cannot contain spaces, slash mark (/), backslash (\), exclamation point (!), angle brackets (< >), or equal sign (=). Also, a period cannot be the first character in the name.

    • Click the checkbox for Create cluster group.

    • Select the appropriate disks in the Available disks list, and use the Add button to move them to the Selected disks list.

    • Optionally, check the Disk names prefix checkbox and enter a disk name prefix to give the disks in the disk group a specific identifier. For example, entering TestGroup as the prefix for a disk group that contains three disks creates TestGroup1, TestGroup2, and TestGroup3 as internal names for the disks in the disk group.

    • Windows Disk Management Compatible Dynamic Disk Group creates a type of disk group that is created by Windows Disk Management (LDM).

    • Click Next.

  7. Click Next to accept the confirmation screen with the selected disks.
  8. Click Finish to create the new disk group.